
A Node-RED package of nodes for the Web of Things.
Can be installed from the Node-RED palette manager directly (see the Node-RED library entry) or via npm (see the npm package). The package provides nodes that can communicate with any HTTP/HTTPS, WebSocket, CoAP/CoAPS, MQTT, OPC UA, and Modbus device based on its W3C WoT Thing Description. The package is built upon the node-wot runtime environment.
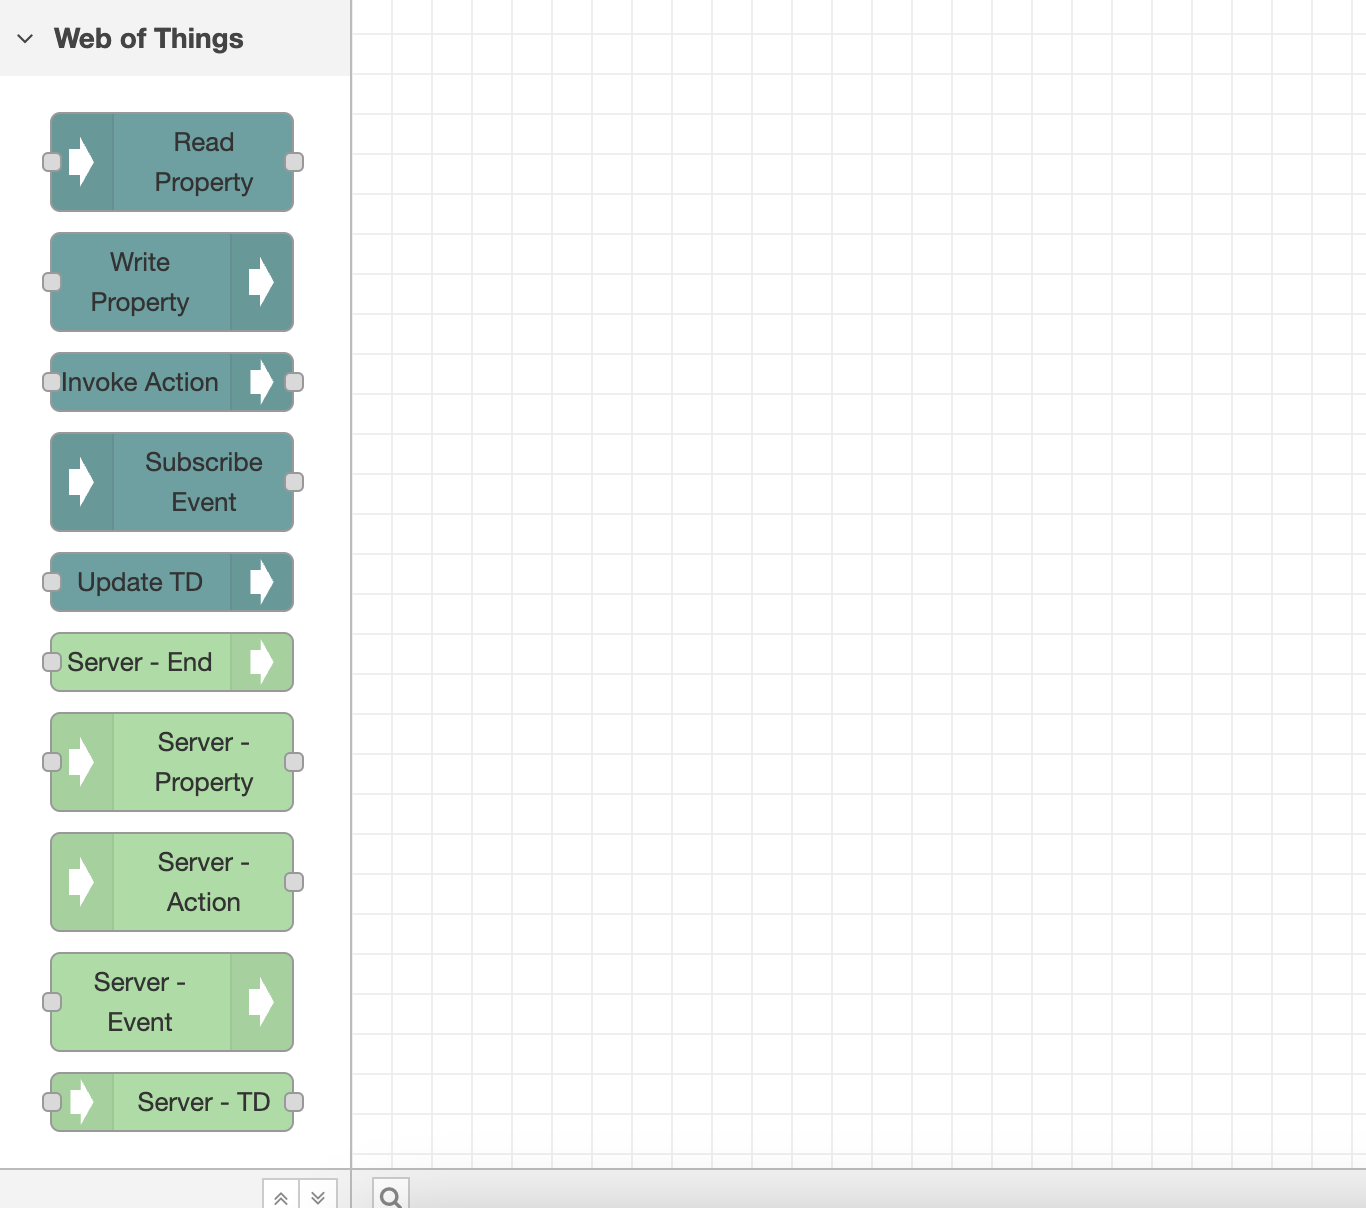
After installation, the package adds eight nodes at the Node-RED palette, each scoped under the Web of Things title. Those nodes are as follows and needed to interact with different interaction affordances of a Thing:
- Read Property node;
- Write Property node;
- Invoke Action node;
- Subscribe Event node;
- Update TD node;
- Server-End node;
- Server-property node;
- Server-Action node;
- Server-Event node;
- Server-TD node.
To consume a Thing and interact with it, drag and drop one of the interaction nodes to a flow. Then, double-click on that node. Click the pencil icon next to the Add new consumed-thing dropdown inside the opened window.
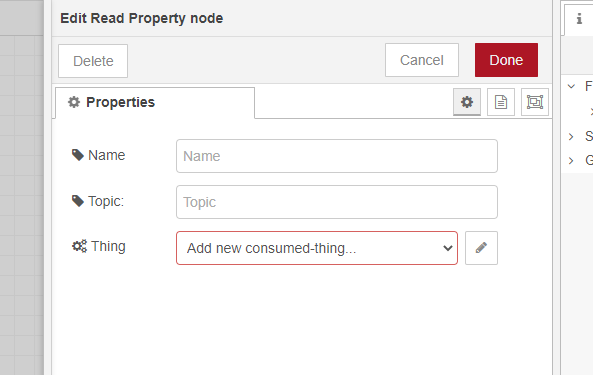
A new window will appear.
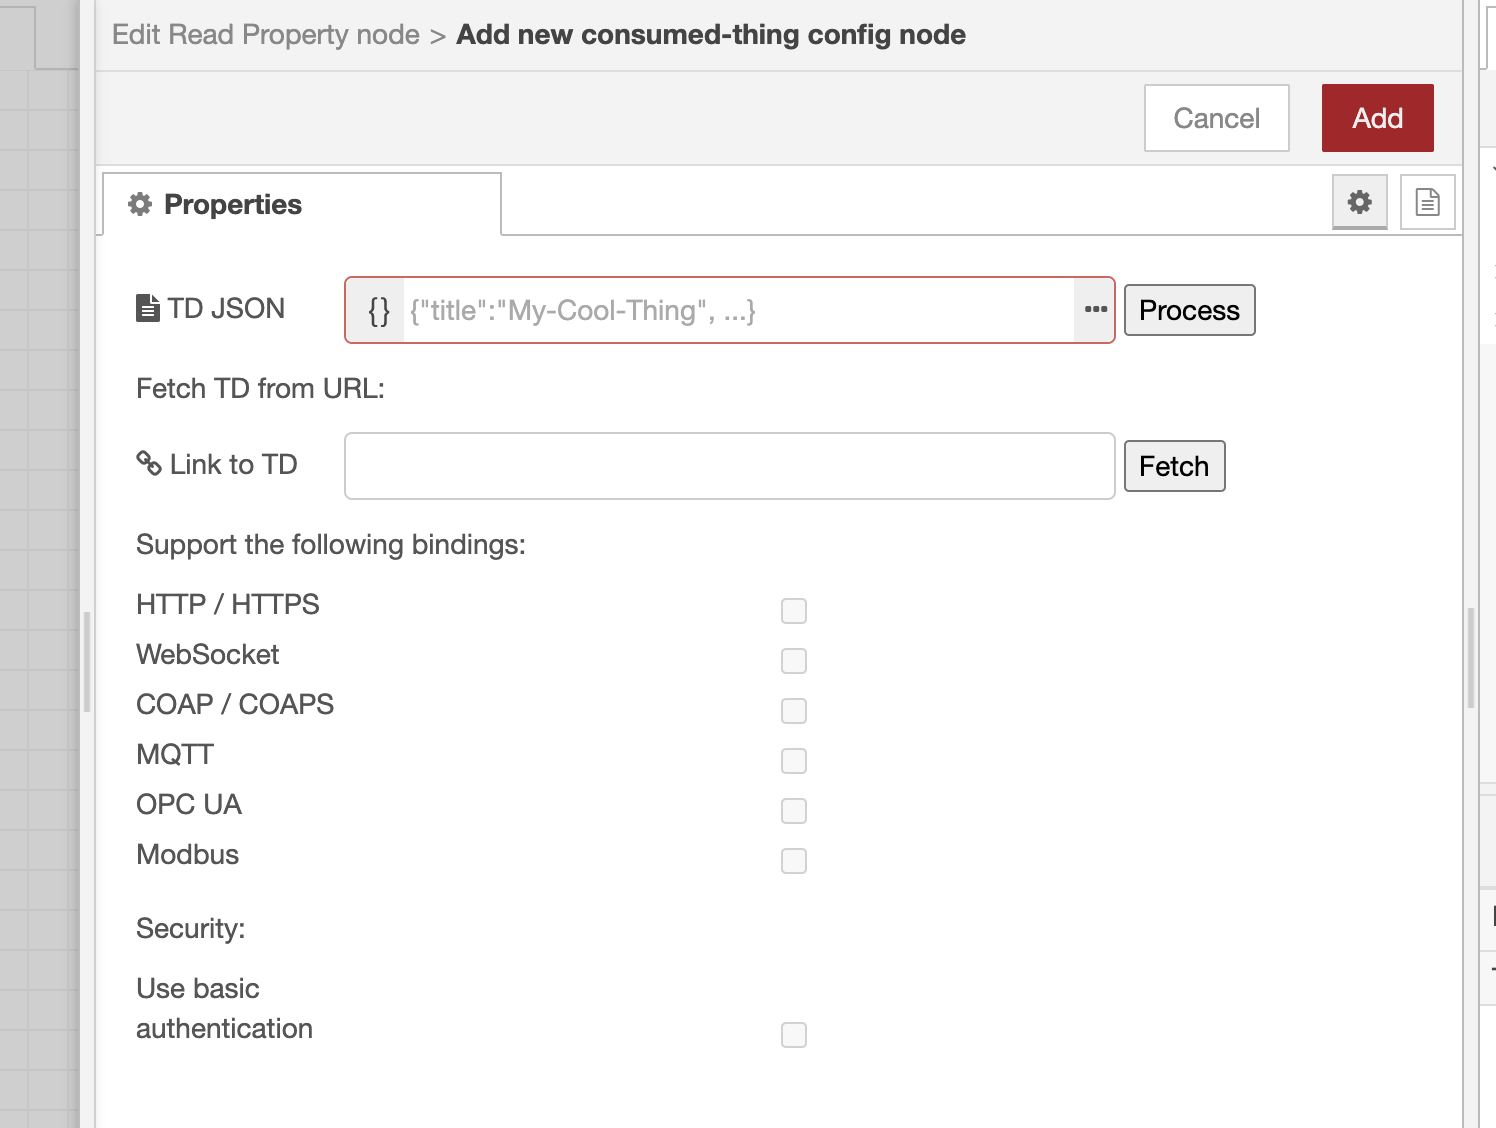
Now, copy-paste/type in a Thing Description inside the TD JSON box or fetch a Thing Description from a URL. Tip: If you choose the first option, click on the three dots to expand the JSON editor. After you click "Process"/"Fetch", all protocol bindings supported by the Thing will be enabled (except this package does not support them). Now, you can leave only the necessary bindings and disable the others. Or you can leave them all as they are. Anyway, this can be changed at any time.
If a Thing needs basic authentication (i.e., using username and password) for any of its interaction affordances, you can enable that in the respective checkbox. Note: Only basic authentication is currently supported by this package. If you enable security, the nodes will automatically infer whether to use authentication for this particular affordance or not based on the provided Thing Description.
Finally, click the red "Add" button in the top right corner.
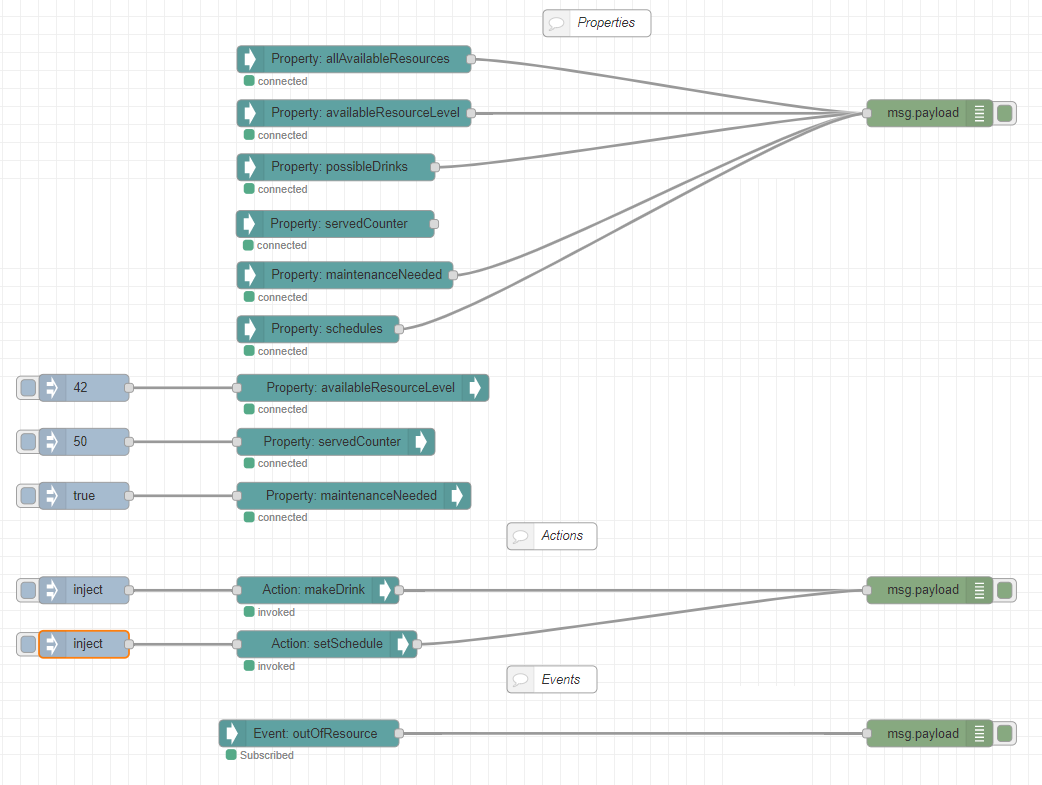
Now, for all WoT nodes you add to a flow, you will see all the respective interaction affordances populated from the Thing Description.
You can also add more Things and choose a particular one for any node you add. To see a fetched property value, you can wire it with the "debug" node of Node-RED and see all the values inside the "Debug messages" tab of Node-RED. Wire an "inject" node with the "Write Property" node to write to a property. Select JSON format as payload in the "inject" node and plug in your value.
To send an input for an action, you can also wire it with the "inject" node, as explained above. Tip: To invoke an action that does not require input, wire it with an empty "inject" node.
Properties and Actions also support uriVariables. They can be specified inside "Read Property"/"Write Property"/"Invoke Action" node properties.
Subscribing to an event is pretty much the same as reading a property.
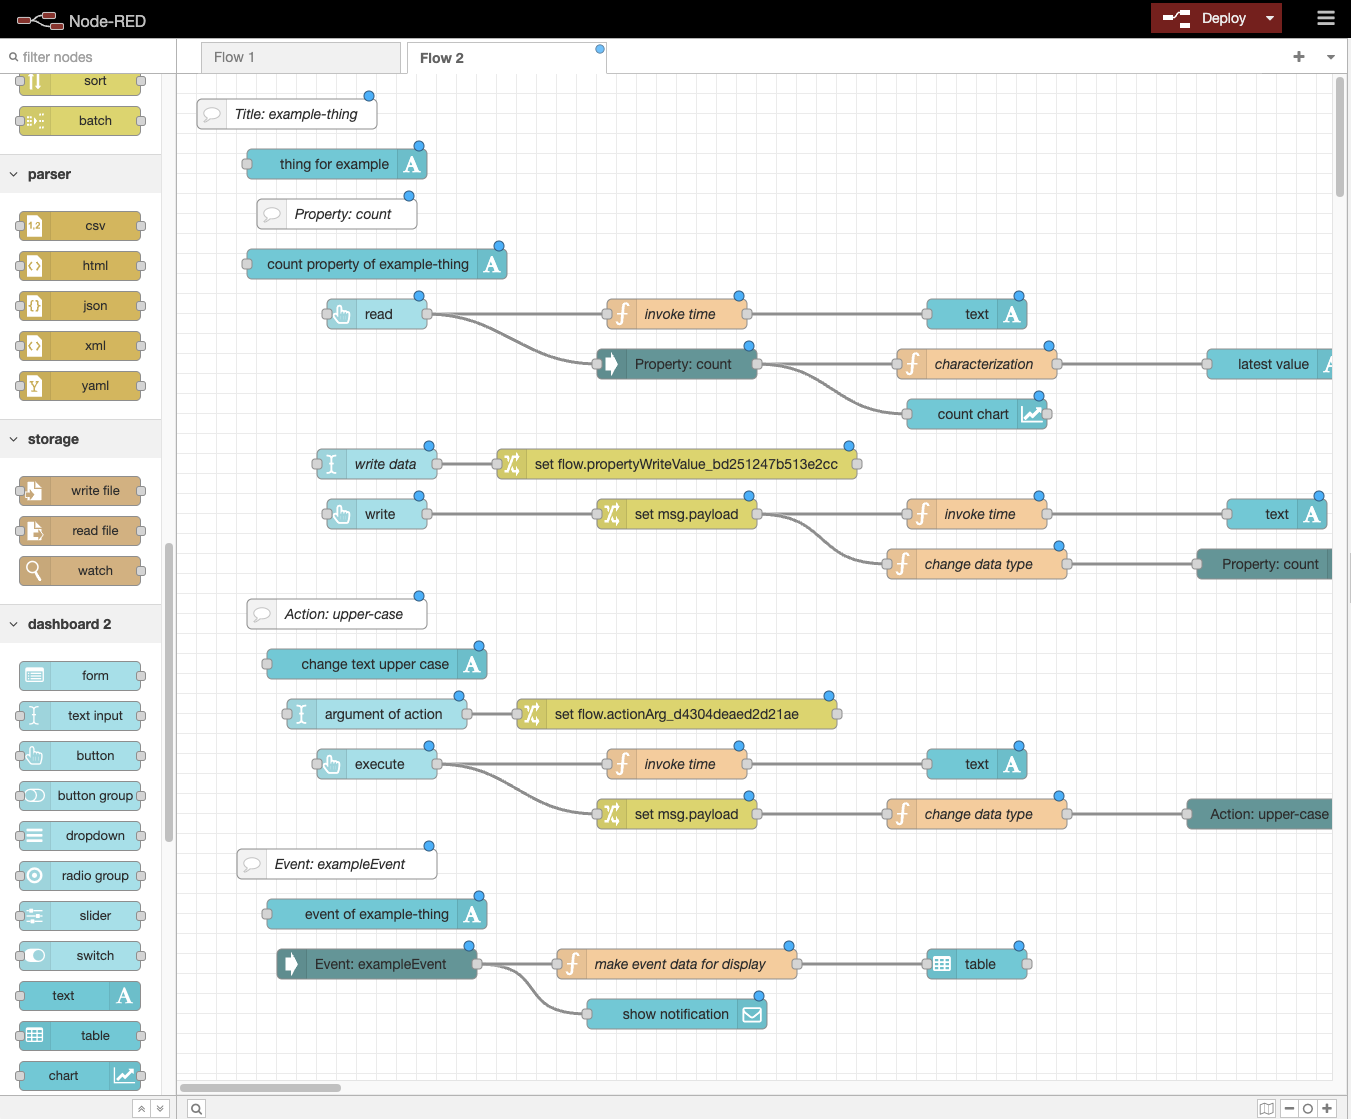
Overall, a basic flow may look like this.
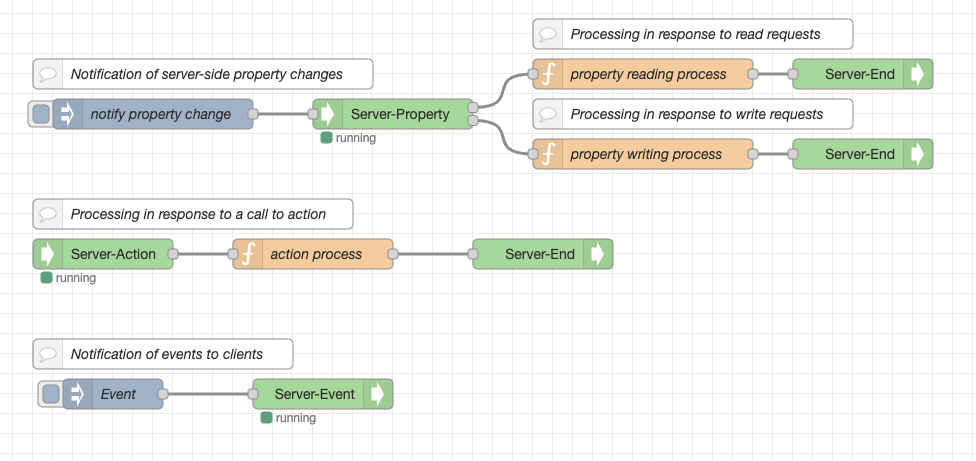
To expose a Thing, firstly, drag & drop one of the nodes belonging to the Thing, either Property(Server-Property), Action(Server-Action), or Event(Server-Event), to the canvas.
When you double-click on that node, a property screen appears.
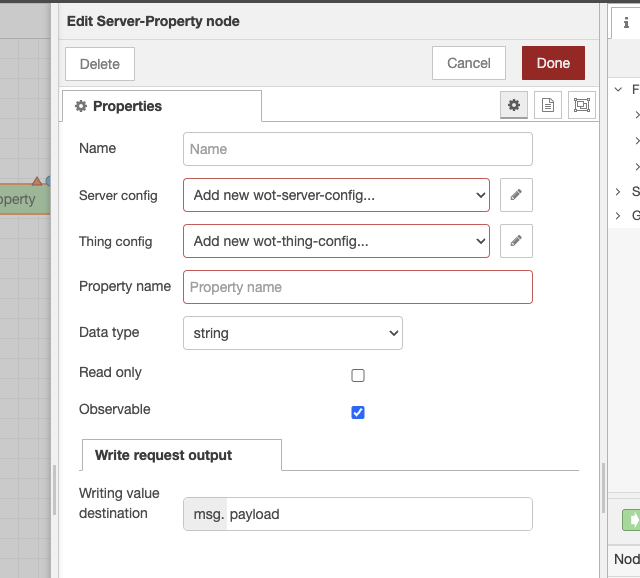
On the properties screen, the Server config and Thing config must be configured. The roles of each config are as follows:
- Server config: Set up the communication method between the client and the Thing.
- Thing config: Set the Thing attributes, such as the Thing title.
By performing Server config and Thing config in the Server-Property, Server-Action, and Server-Event nodes, you determine how to publish properties, actions, and events.
The following screen will appear if you create a new server config on the properties screen.
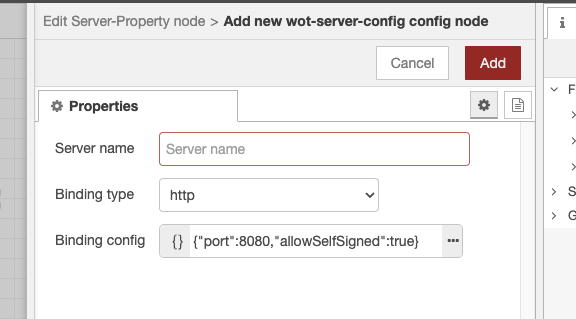
Perform the following settings:
- Server name: Specify the server name.
- Binding type: Specify the communication method between the server and the client.
- Binding config: Perform settings according to the type of binding.
If you create a new thing config on the properties screen, the following screen will appear.
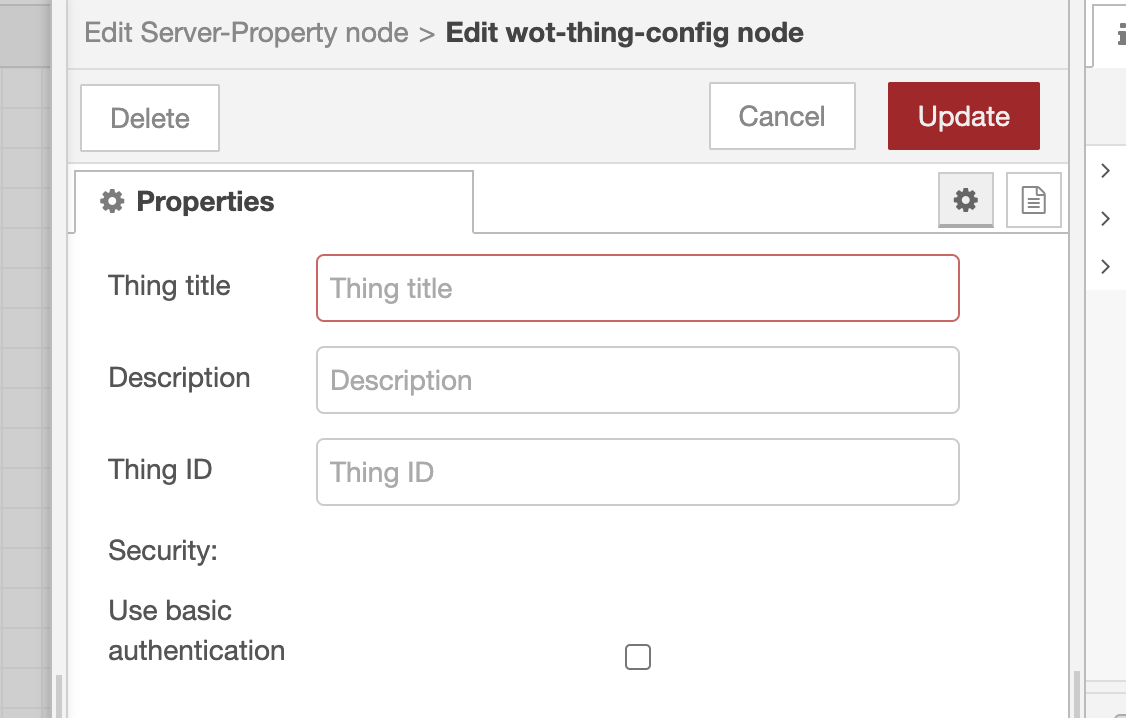
Specify the Thing title. The Thing title will be included in the Thing Description.
Description and Thing ID are optional; if Thing ID is not specified, Thing ID will be generated automatically.
Server config and Thing config can be shared across multiple Server-Property, Server-Action, and Server-Event nodes. By sharing configs, you can publish one or more properties, actions, and events to the client as a single Thing.
In addition to server config and Thing config, there are necessary settings for each Server-Property, Server-Action, and Server-Event node. For the settings of each node, refer to the node help. Help can be viewed on the Node-RED editor's Help tab.
The Server-End node represents the end of a flow executed by a client request. Flows connected to the two output terminals of the Server-Property node (read/write requests) and the output terminal of the Server-Action node must end with the Server-End node.
Here's an example of a flow:
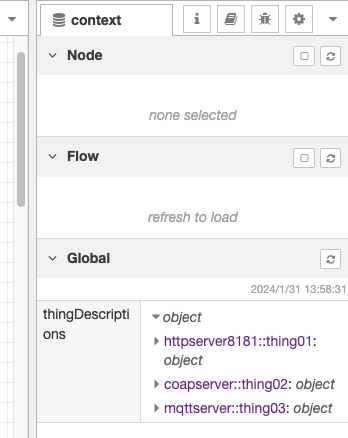
The Thing Description required when the client uses a Thing is set in the thingDescriptions object of the global context. The member name is <server name>::<Thing title>.
If you want to check the Thing Description, open the Context Data tab of the Node-RED editor and press the refresh icon of the Global context to display it.
The Thing Description can also be obtained using the Server-TD node.
Also, the client can use the Update TD node to replace the Thing Description. For example, if the server URL changes, the destination server can be changed without restarting the flow.
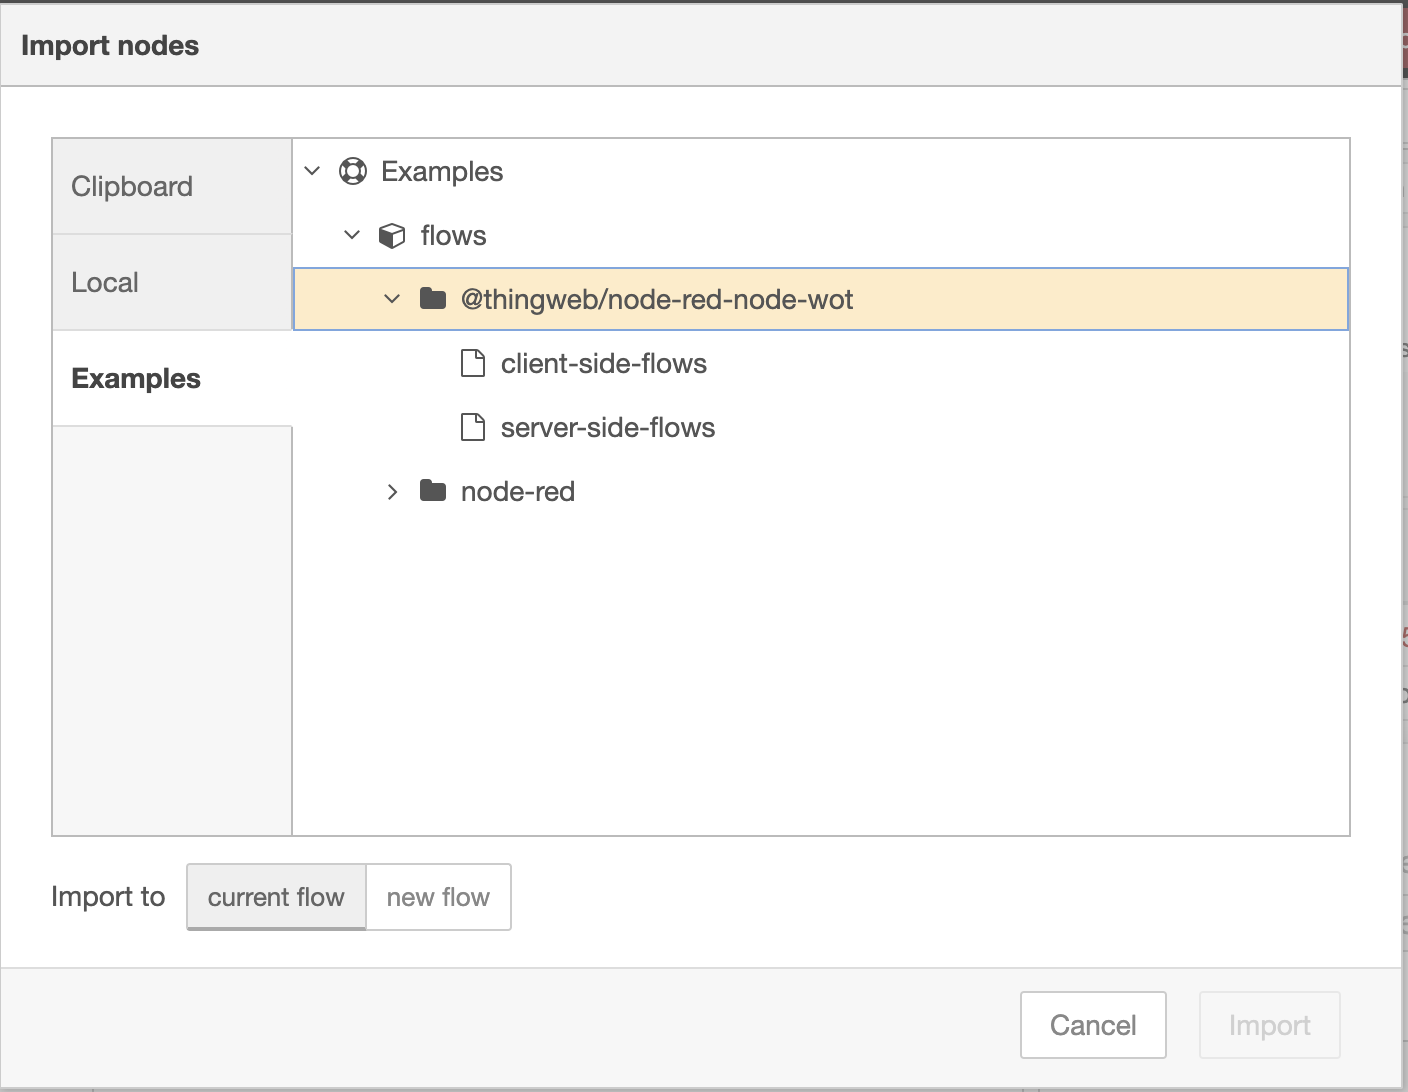
You can get the Example from the Import menu of the Node-RED editor for reference.
Currently, the supported binding types are HTTP, CoAP, and MQTT. As shown in the table below, each of these bindings has its own available/unavailable functions. Available functions are denoted by ✓ and unavailable functions are denoted by -.
| http | coap | mqtt | |
|---|---|---|---|
| read property | ✓ | ✓ | - |
| observe property | ✓ *1 | - | ✓ |
| write property | ✓ | ✓ | ✓ |
| invoke action | ✓ | ✓ | - |
| subscribe event | ✓ *1 | - | ✓ |
*1: After the connection with the server times out after 1 hour, it is not reconnected
Also, it is unclear how to define the flow when the data type is null.
This plugin allows the automatic creation of Consumer flows with UIs for WoT Things. This UI can be from a web browser.
Please install the @flowfuse/node-red-dashboard node beforehand, as the UI functionality depends on it.
Nodes are installed by clicking on the menu icon in the upper right corner and then clicking on the Manage palette.
The procedure for creating a Consumer flow and using it from a web browser is as follows:
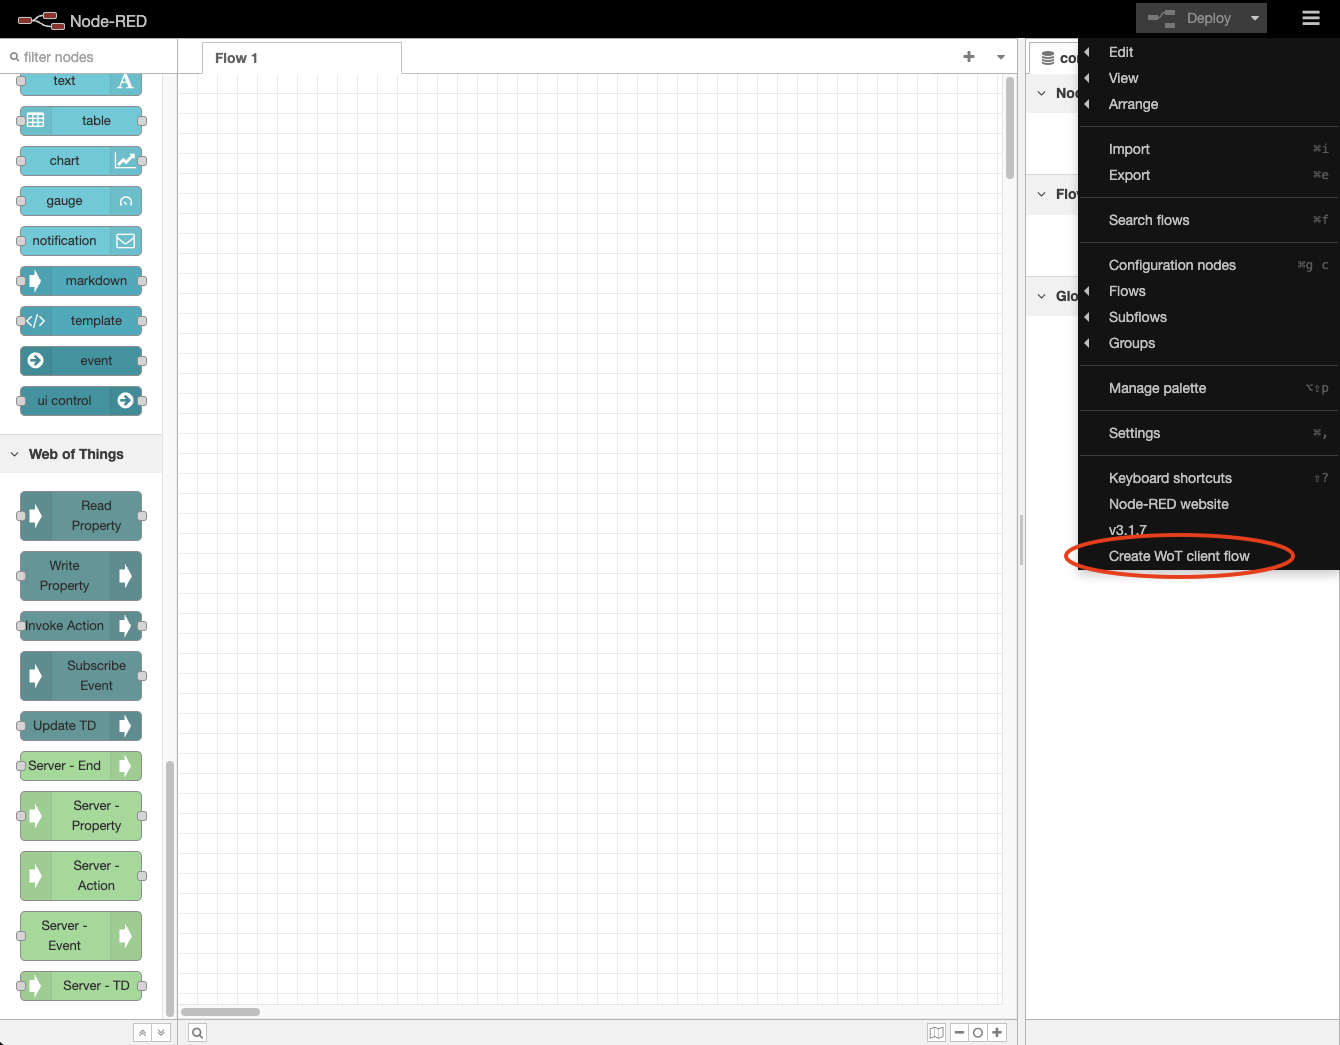
- Click on the
Create WoT Consumer flowwhen you click on the menu icon in the upper right corner.
- When the dialog screen for entering the Thing Description appears, copy and paste the Thing Description and click the
OKbutton.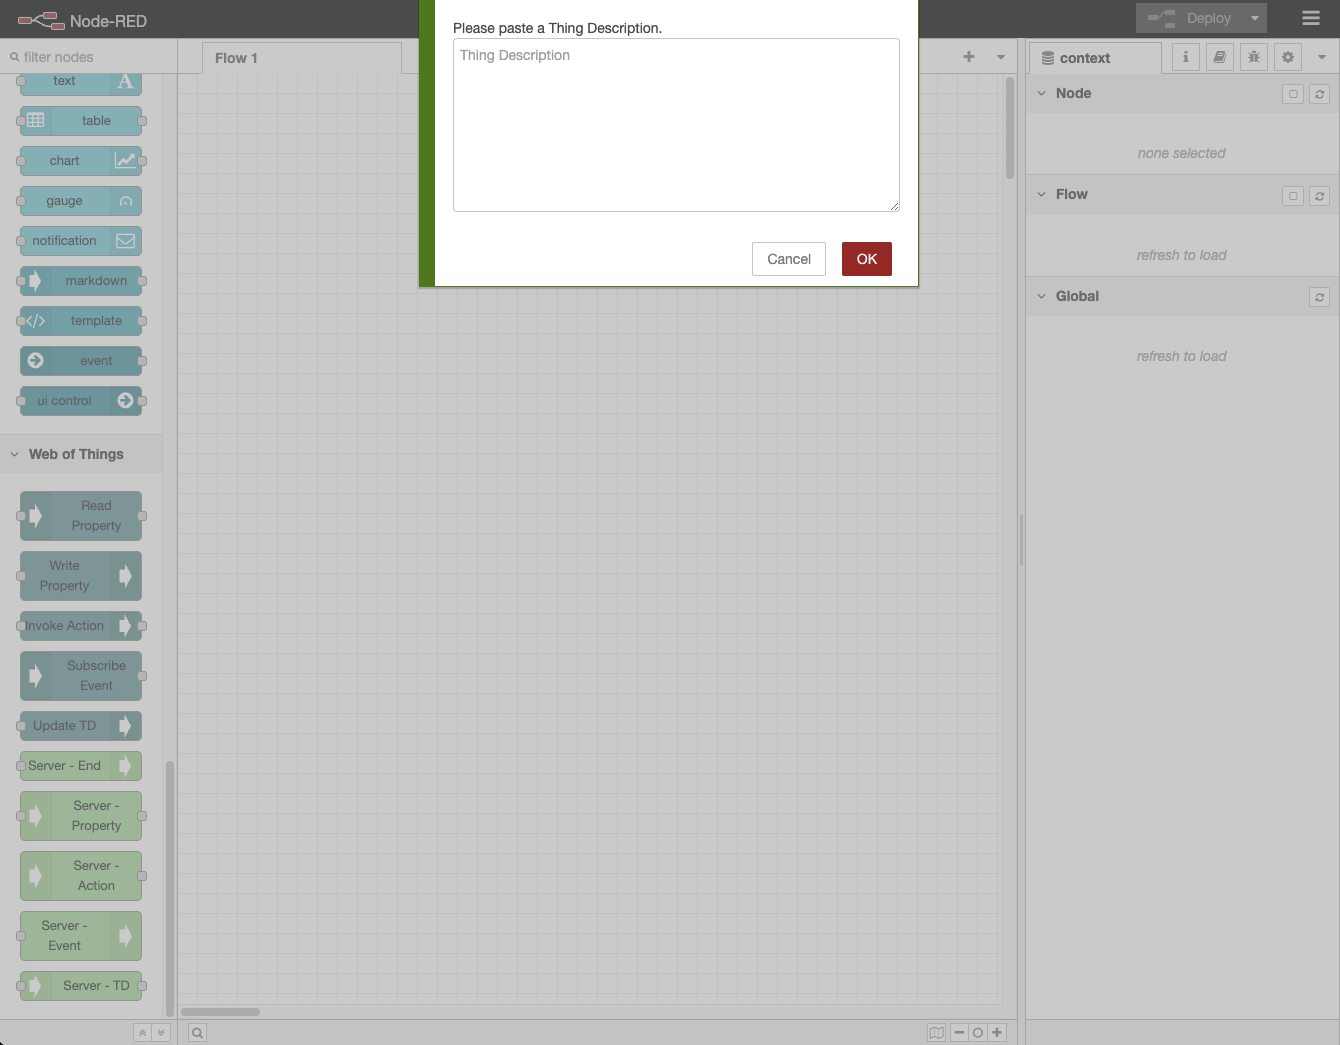
- When the new flow screen appears, place the created flow.
- Press the
Deploybutton to execute the created flow. - Display the
Dashboard 2.0tab and press theOpen Dashboardbutton.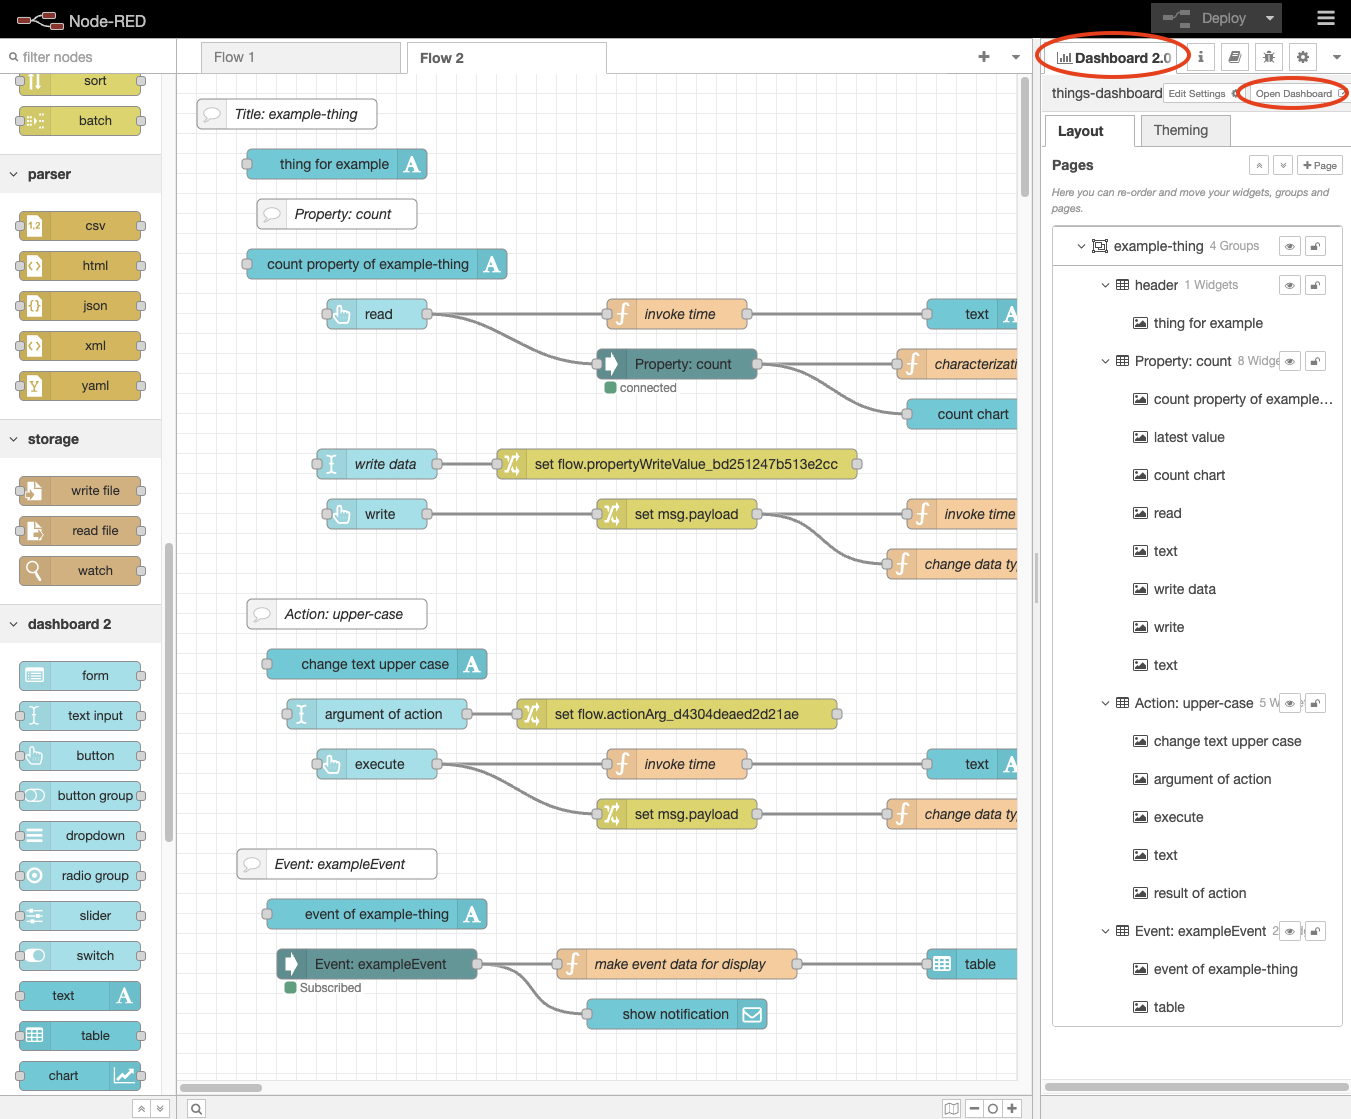
- The WoT Consumer UI will appear in your web browser.
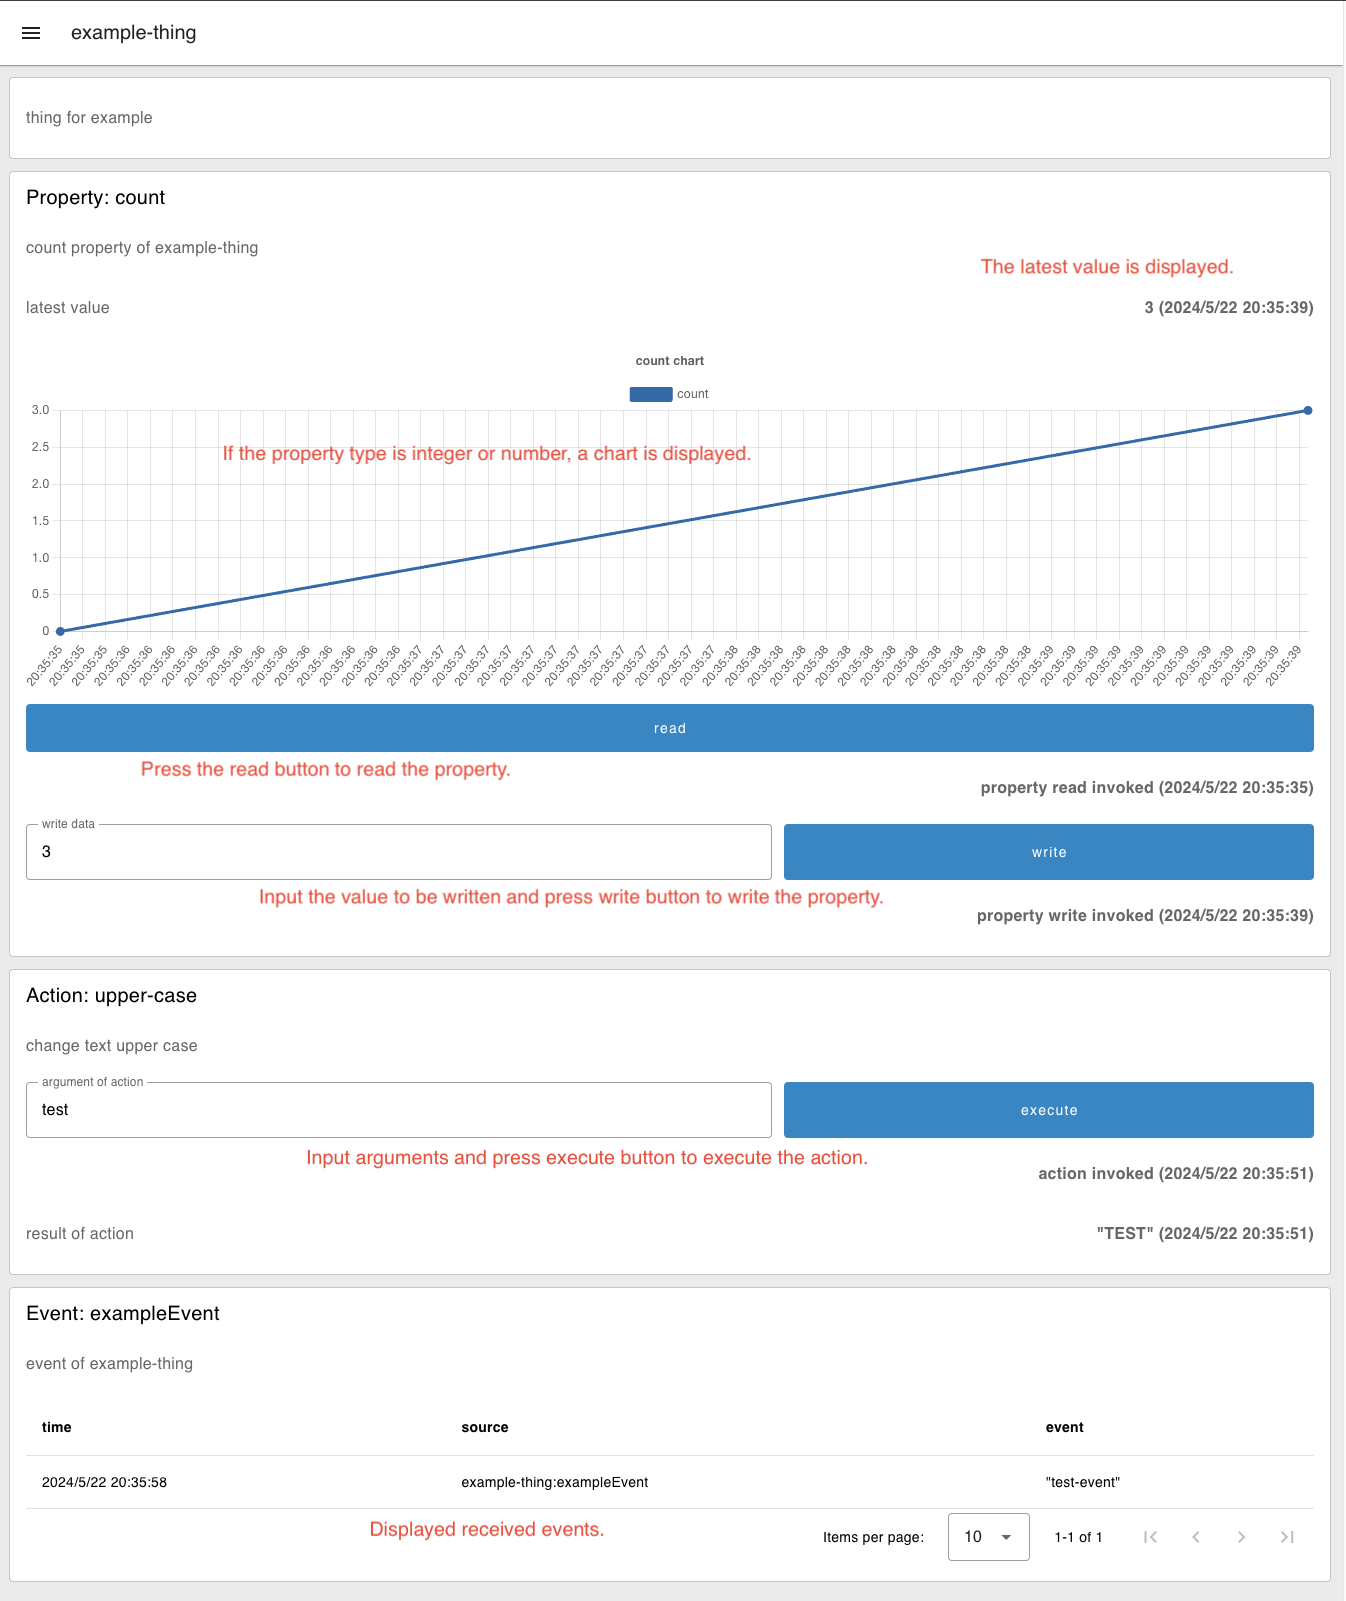
Feel free to modify the created flow.