Depreciated! Please use Scandit-React-Native
The functionality of this package has been replicated to the Repository
- GitHub: https://github.com/Scandit/barcodescanner-sdk-react-native
- NPM module: https://www.npmjs.com/package/scandit-react-native
- Documentation: https://docs.scandit.com/stable/react_native/react-native-integrate.html
yarn add scandit-react-nativePlease make sure you transition to the official package, as this module will not receive any further updates. A warning has been added to the NPM listing.

react-native-scandit
 We (Shoplink GmbH) are a premium scandit-partner and in the process of merging our internal react-native bridge into this repository for public access. This project was originally created by @Boris-c at the Digital Epidemiology Lab at EPFL, Switzerland (Salathe Group).
Run the iOS & Android Demo App
- If you don't have an account, register on Scandit for a 30 day trail.
- Download the Scandit iOS and Android BarcodeScan SDK
- Clone this Repository (the demo app is inside the
_demo_/sub-folder) cd _demo_- Set your API Key inside of the
CONFIG.jsfile - run
yarn install(ornpm installif you only use npm) - Android
- Copy the
ScanditSDKfolder (containing the .aar file in its root) into_demo_/android/app/src/vendor/ - Start the App in the emulator or device via
react-native run-android(emulator: you need to set a webcam as a camera in your emulator to test barcode scanning)
- Copy the
- iOS
- Copy the
ScanditSDKfolder (containing the .framework file in its root) into_demo_/ios/ - Open the
scandit.xcodeprojwith xcode and set your developer account for the targetsscandit&scanditTests - Connect your iOS device and run the build from xcode (simulator has no camera)
- Copy the
- Use Storybook
- This demo implements storybook for react native. You can run the storybook via
npm run storybook. Don't forget to set your local IP of your computer inside of_demo_/app/storybook.jsfor on device testing. Default: localhost.
- This demo implements storybook for react native. You can run the storybook via
Option 1: Installation
$ react-native install react-native-scandit
Note:
- Scandit's SDK is required. See below how to add it to the iOS and Android projects.
- You need to allow access to the camera, both for iOS and Android. Barcode scanning can not be tested in the iOS Simulator.
- The npm package is found in thee root of this repository.
Option 2: Manual Package installation for iOS and Android
$ yarn install react-native-scandit
iOS
- In Xcode, in the project navigator, right click
Libraries➜Add Files to [your project's name] - Go to
node_modules➜react-native-scanditand addSGScandit.xcodeproj - In Xcode, in the project navigator, select your project. Add
libSGScandit.ato your project'sBuild Phases➜Link Binary With Libraries - Run your project (
Cmd+R)<
Android
- Open up
android/app/src/main/java/[...]/MainActivity.java
- Add
import com.reactlibrary.SGScanditPackage;to the imports at the top of the file - Add
new SGScanditPackage()to the list returned by thegetPackages()method
- Append the following lines to
android/settings.gradle:include ':react-native-scandit' project(':react-native-scandit').projectDir = new File(rootProject.projectDir, '../node_modules/react-native-scandit/android') - Insert the following lines inside the dependencies block in
android/app/build.gradle:compile project(':react-native-scandit')
Add the Scandit SDK to your Project
iOS
- Download Scandit SDK for iOS (https://ssl.scandit.com/sdk, Scandit account required) and uncompress the archive.
- Copy the
ScanditSDKfolder to yourios/folder. Note: This project assumes your ios project is underios/— if not, you need to change theScanditSDK_Locationuser property under Build-Settings (way at the bottom) inside the SGScandit.xcodeproj manually. - Continue with the Scandit install documentation (which is at the time as follows):
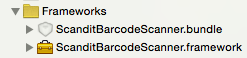
- Drag the
ScanditBarcodeScanner.frameworkfrom yourios/ScanditSDKfolder (Finder) inside xcode, into your projectsFrameworks/group. (If you don't have a Frameworks Group, create one via right click -> Create Group. Name it "Frameworks"). - A Model Pops-Up asking how xcode should add this file. Check both "Copy Items when needed" & "Create Groups". Select your target (should be selected) & hit ok.
- Drag the
ScanditBarcodeScanner.bundlefrom inside the frameworks package (ios/ScanditSDK/ScanditBarcodeScanner.framework/Resources/ScanditBarcodeScanner.bundle) into the Frameworks group as well. - The result should look something like this:
- Scandit requires additional native libraries. At a minimum
libiconv.tbd,libz.tbdandMediaPlayer.framework(if it does not compile, check the scandit documentation for the others libraries/frameworks and add the ones you are missing). Add them by selecting your Project-Root in Xcode -> Select your Target and add them underLinked Frameworks and Librariesvia the "+". - Scandit requires camera access. Make sure to add the "Privacy - Camera access" to your info.plist file in xcode (click "+" at the top and search for "Privacy - Camera..." via the auto complete. As a value, write a short description for what the camera will be used. For example "Camera is needed to scan barcode".
- Don't forget: You can not use the Camera in the simulator. So you need to use a real device for testing (!).
Android
- Download Scandit SDK for Android (https://ssl.scandit.com/sdk, Scandit account required) and uncompress the archive. The rest is in line with scandit android setup documentation by doing the following...
- Create a folder named
vendorinside ofandroid/app/src/. - Place the ScanditSDK folder (the one containing the .aar file in its root) from the archive into
android/app/src/vendor/so that the path to the ScanditSDK isyour-rn-project/android/app/src/vendor/ScanditSDK/ScanditBarcodeScanner.aar. - Add to the
android/build.gradlefile the flatdir path$rootDir/app/src/vendor/ScanditSDK. Do that inside of theallprojects { repositories {section, so the final result looks something like this:
(..)allprojects { repositories { // SCANDIT INSERT -----> flatDir { dirs "$rootDir/app/src/vendor/ScanditSDK" } // <----- SCANDIT INSERT END maven { // All of React Native (JS, Obj-C sources, Android binaries) is installed from npm url "$rootDir/../node_modules/react-native/android" } }}- Go into your
android/app/build.gradleund add to the dependencies section (located at the end of the gradle file) the linecompile(name:'ScanditBarcodeScanner', ext:'aar')BEFORE the "compile project(':react-native-scandit')", so that your dependencies look something like this:
(..)dependencies { // (..) // <--- INSERT BEFORE react-native-scandit compile statement compile // (..) compile compile "com.android.support:appcompat-v7:23.0.1" compile "com.facebook.react:react-native:+" // From node_modules }(..)- Scandit requires camera access. Make sure to add to your
AndroidManifest.xml(underandroid/app/src/main/) the folliwng permission:
Usage
;; ; Scandit; { superprops; thishandleContinueButton = thishandleContinueButton; thisstate = showScanner: false } // Pause on a detected barcode (camera video is shown, but not parsed for barcodes). // Comparison: stop - startScanning() would freeze the camera image up on detection. { thisscanner; Alert; }; { return <View style= flex: 1 > <ScanditPicker ref= { thisscanner = scan; } style= flex: 1 settings= enabledSymbologies: 'EAN13' 'EAN8' 'UPCE' cameraFacingPreference: 'back' workingRange: 'short' onCodeScan=thisonBarcode /> <Text>Using Scandit SDK ScanditSDKVersion</Text> </View> ; } AppRegistry;Available Settings
type ScanditSettingsType = activeScanningAreaLandscape?: ScanditScanAreaType; activeScanningAreaPortrait?: ScanditScanAreaType; cameraFacingPreference?: 'front' | 'back'; codeCachingDuration?: number; codeDuplicateFilter?: number; codeRejectionEnabled?: boolean; enabledSymbologies?: ScanditSymbologyType; force2dRecognition?: boolean; highDensityModeEnabled?: boolean; matrixScanEnabled?: boolean; maxNumberOfCodesPerFrame?: number; motionCompensationEnabled?: boolean; relativeZoom?: number; restrictedAreaScanningEnabled?: boolean; scanningHotSpot?: ScanditPointType; workingRange?: 'standard' | 'long';Note: Due to traversal, boleans and numbers may have to be passed as strings. I.e.
true="true".
React Native Props:
settings: Scandit picker settings (see above)
onScan: on scan, called with the full object passed by Scandit's SDK
onCodeScan: on scan, called with the last scanned barcode only
onSettingsChange: obvious. Can be used to update the interface (i.e. a button that shows “Use front camera” / “Use back camera”)
JS:
getSettings(): Promise<*>
setSettings(settings: SettingsType): Promise<*>
startScanning(): Promise<*>
These return a promise, that can resolve or reject. On Android, I had to resolve to a promise implementation on the JS side (see SGNativeComponent.js), since React Native doesn’t seem to handle it (did I miss something?).
startScanningInPausedState()
stopScanning()
pauseScanning()
resumeScanning()
These don’t return a promise but could. As everything was quite experimental, I didn’t reach that point.
activity(): string
Ideally, this should return the current state ('active', 'paused', or 'stopped'), but it doesn't (TODO kind of thing...).
Contribution
Please create issues if you encounter problems. In terms of contribution, Scandit maintains an official cordova plugin. It is technically possible to migrate cordova plugins to react-native (see links below).
- Cordova Parity: If you have some ideas how to do so, or see missing (promise based) implementations, feel free to reach out or issue pull requests.
- Testing: If you have an idea for automatic testing of the bridge (continues integration, E2E tests), let us know.
- UI Overlays: Scandit is a barcode scanner. In most cases, you want to display additional information on top of it without covering interaction elements. We show animations and other information when interacting with barcodes. However, a best practice of overlaying views is still missing.