 ProViewer
ProViewer is a 3D model viewer for the safe and fast rendering of the most common 3D model files using the three.js library. This viewer uses encryption and decryption algorithms for the safe transaction of model files on the Internet and protection of model files from illegal copying. Currently, it supports a total of 16 different model file formats, with more to come in the future. Additionally, it will soon offer special shaders and post-processing plugins for realistic rendering and further analysis.
Supported file formats
3DS, 3MF, AMF, DAE, FBX, MD2, GLB, GLTF, KMZ, OBJ(MTL), PLY, STL, SVG, VTK, VOX, WRL
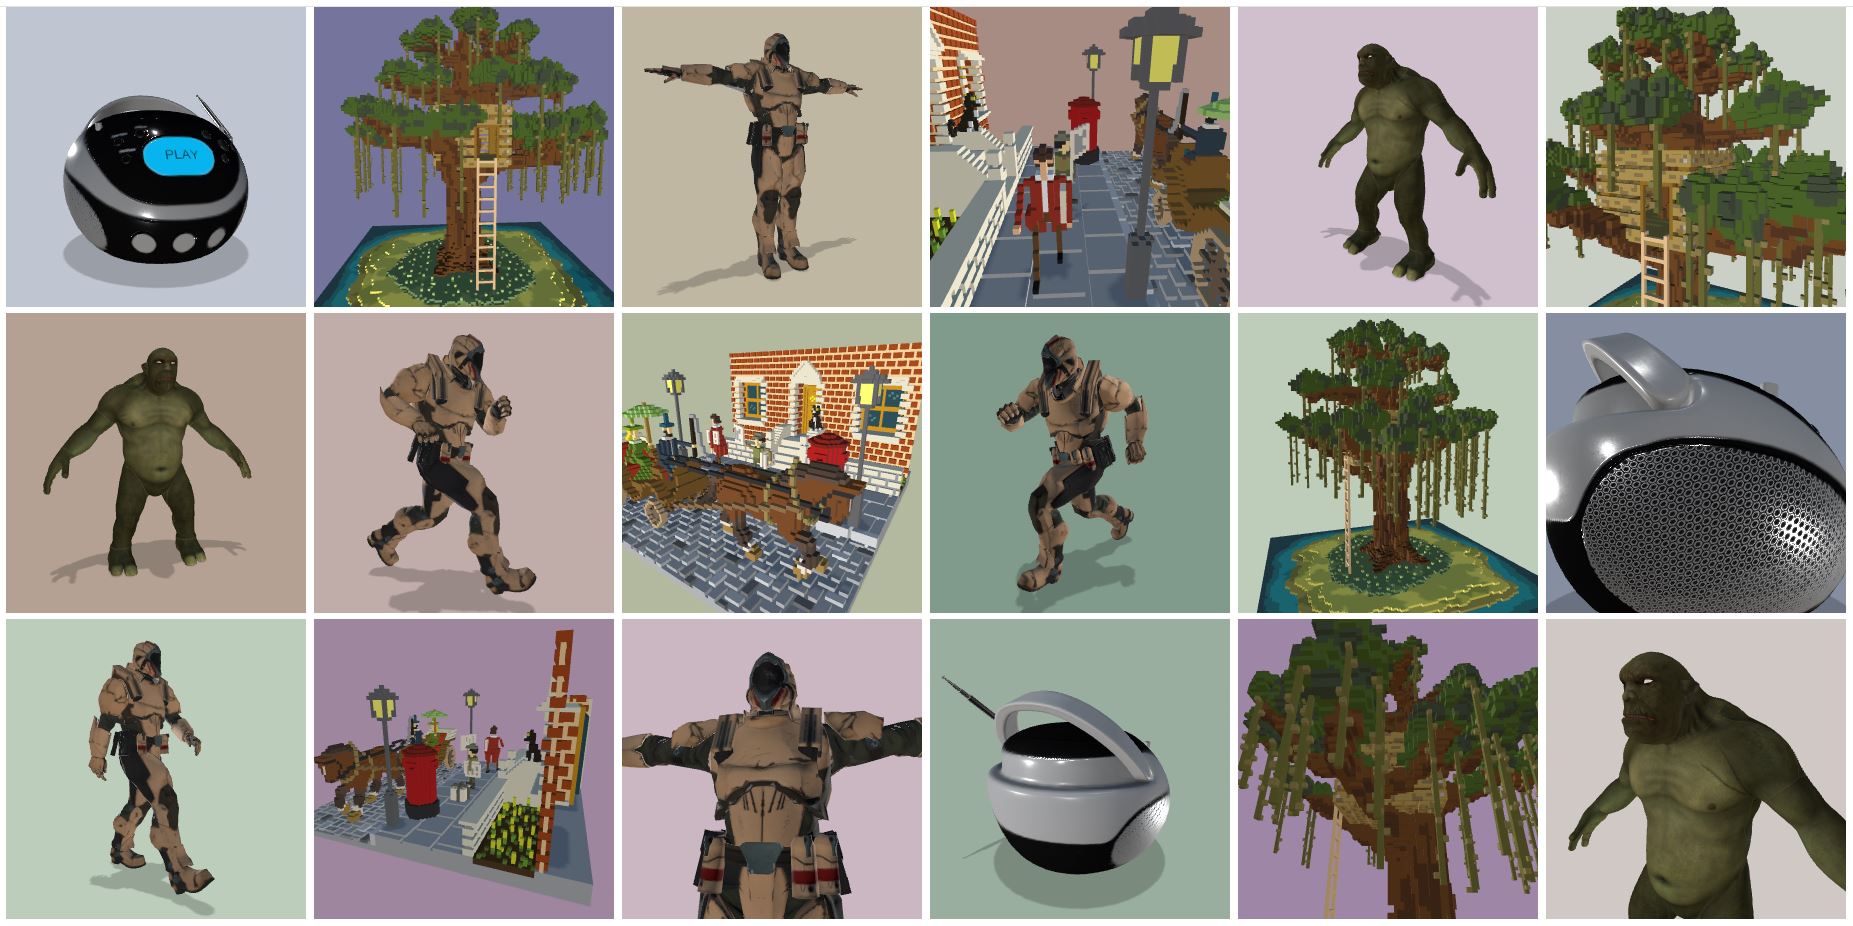
The figures below show the rendered images after loading the sample models. Each of the first 8 images resulted from rendering one model file per viewport, and the remaining 18 images were created at the same time using multiple grid viewports.
Website
You can run this viewer at the website: https://nova-graphix.github.io/proviewer.js/.
Installation
You can install this viewer (called proviewer) to your project by executing:
npm install proviewerThen, you should include proviewer to your project as follows:
import { renderModels } from 'proviewer';
renderModels( options );
where the renderModels() is a JavaScript function that renders models, and the options is a JavaScript object that contains the URL of the model.
Usage
-
Viewing models by dragging and dropping: With the Javascript code below, you can view your model by dragging and dropping your model file on the viewport created by the function renderModels().
import { renderModels } from 'proviewer';
renderModels();
-
Viewing a specific model: The following code shows an example of rendering a specific model using renderModels(). In the code below, id is the ID of the <div> HTML element for the model, style is the CSS codes that style the <div> element, img is used for the background image of this viewer, and url is for model URLs. You can write one or more model URLs in this url. In addition, you can also bundle multiple models into a zip file and enter it into this url.
import { renderModels } from 'proviewer';
renderModels({
    id:    'model',
    style: 'width:800px; height:600px; border:....',
    img:   'path/to/image.jpg',
    url:   'path/to/model.glb',
});
-
Viewing multiple models in grid viewports: As shown above, multiple models can be placed in grid viewports using just one WebGL renderer. In the code below, id is the ID of the <div> HTML element as a model container, and children are child elements of this <div> element, each of which renders a model within its viewport.
import { renderModels } from 'proviewer';
renderModels({
    id: 'models',
    children: [
        { style: "width:300px; height: 300px;", url: "path/to/model_01.glb" },
        { style: "width:300px; height: 300px;", url: "path/to/model_02.zip" },
        { style: "width:300px; height: 300px;", url: "path/to/model_03.stl" },
        ....
    ]
});
Note that the <canvas> HTML element is created internally, and all models are drawn on this <canvas> element.
-
Encryption and decryption of model files: The function openEncryptFiles() encrypts model files with a model encryption key to prevent illegal copying on the Internet. The encrypted files can return to their original file state through the function openDecryptFiles() with a model decryption key. A file dialog box is opened by these functions. Then, the user selects the directory where the files to be encrypted or decrypted exist. When you press the OK button, the encryption or decryption process begins. Note that two secret keys for encryption and decryption are provided only to paid users.
import { openEncryptFiles, openDecryptFiles } from 'proviewerx';

// NOTE-1*: two model secret keys are provided only to paid users
// NOTE-2*: HTTPS is required for encryption and decryption
openEncryptFiles( settings.MODEL_ENC_KEY );
openDecryptFiles( settings.MODEL_DEC_KEY );
In the code above, settings is an object that plays the same role as process.env.
Functions to assist model viewing
-
background
Press the key b on your keyboard. Then, you can see that the background image changes. There are approximately 5 background images available. -
lights
Press the key l on your keyboard to increase the intensity of light sources illuminating the model. To decrease the light intensity, hold down the shift key and press the key l. -
matcap
Press the key m to apply the matcap (material capture) shader. Press it again to remove the shader. -
normals
Press the key n to map the normal vectors to RGB colors. Press it again to remove the mapping. -
animation
Press the key p to play the model animation. If you want to see the next animation, press the key p again. To pause the animation, press the key o. -
wireframe
Press the key w to view the model's geometry as a wireframe. Press it again to go back.
Keywords
3D, javascript, html5, WebGL, three.js, model-viewer, 3D-viewer, model-inspector, 3DS, 3MF, AMF, DAE, FBX, MD2, GLB, GLTF, KMZ, OBJ(MTL), PLY, STL, SVG, VTK, VOX, WRL
Questions or suggestions
Please contact us at info@nova-graphix.com for any questions or suggestions.
Thank you for reading the above description on ProViewer, developed by NovaGraphix, Co. We will continue to share new features and technologies through YouTube, Facebook, and Linkedin.


